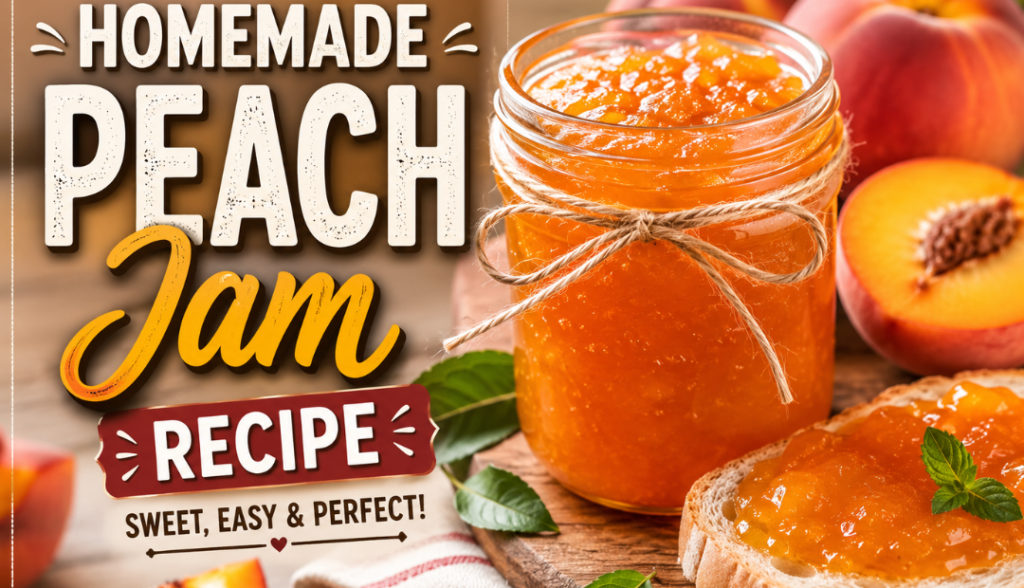
There is nothing quite like the flavor of a perfectly ripe, juicy summer peach. The only downside? Their season is notoriously fleeting. The best way to lock in that vibrant, sun-drenched flavor is by making your own homemade peach jam.
Many people shy away from jam-making because they think it requires complex canning equipment or commercial pectin. But this recipe keeps things beautifully simple. By using just three basic ingredients, we rely on the natural sugars and fruit acids to create a perfectly spreadable, intensely flavorful jam that tastes like pure summer sunshine.
Ingredients and Prep
Because this recipe contains no artificial preservatives or added pectin, the quality of your ingredients matters. Look for peaches that are fragrant and slightly soft to the touch.
| Ingredient | Amount | Why It Matters |
| Fresh Peaches | 2 lbs (approx. 4-5 large peaches) | Peeled, pitted, and finely chopped. The star of the show. |
| Granulated Sugar | 1.5 cups | Acts as a preservative and helps the jam set. Adjust slightly based on fruit sweetness. |
| Fresh Lemon Juice | 2 tbsp | Crucial acid that reacts with natural fruit pectin to thicken the jam and balance the sweetness. |
Step-by-Step Instructions
Before you begin, place two small ceramic plates or spoons into your freezer. You will need these later to test if your jam has set properly.
1.Peel and chop the peaches: 10 mins.
To easily peel your peaches, drop them into a pot of boiling water for 30 seconds, then immediately transfer them to an ice bath. The skins will slip right off. Once peeled, remove the pits and chop the flesh into small pieces.
2.Macerate the fruit: 15-30 mins.
In a large, heavy-bottomed saucepan, combine the chopped peaches, sugar, and fresh lemon juice. Stir well and let the mixture sit at room temperature. This process, called maceration, draws out the natural juices and helps the sugar dissolve.
3.Bring to a boil: 5 mins.
Place the saucepan over medium-high heat. Bring the mixture to a full, rolling boil, stirring constantly with a wooden spoon or silicone spatula to ensure the sugar doesn’t burn on the bottom of the pan.
4.Simmer and thicken: 15-20 mins.
Reduce the heat to medium. Let the jam simmer, stirring frequently. As it cooks, mash large fruit pieces with your spoon or a potato masher if you prefer a smoother texture. The jam will deepen in color, bubbles will slow down, and it will begin to look glossy and thick.
5.Perform the freezer plate test: 2 mins.
Remove the saucepan from the heat. Take one of your cold plates out of the freezer and drop a small spoonful of hot jam onto it. Let it sit for 30 seconds, then push it gently with your finger. If it wrinkles and holds its shape, it’s ready! If it’s still runny, simmer for another 2-3 minutes and test again.
6.Jar and storage: 5 mins.
Ladle the hot jam into clean glass jars, leaving about a quarter-inch of space at the top. Let the jars cool completely to room temperature before screwing on the lids.
Storage Tip: Because this is a quick “refrigerator jam” and hasn’t been processed in a traditional hot-water bath canner, it must be stored in the fridge. It will keep beautifully for up to 3 to 4 weeks—though it rarely lasts that long before being completely eaten! You can also freeze it for up to 6 months.
How to Enjoy Your Harvest
While this jam is legendary on a warm, buttered piece of sourdough toast, don’t stop there. It makes an incredible swirl inside a bowl of plain Greek yogurt, a brilliant topping for vanilla bean ice cream, or a sweet glaze for grilled pork chops and chicken.