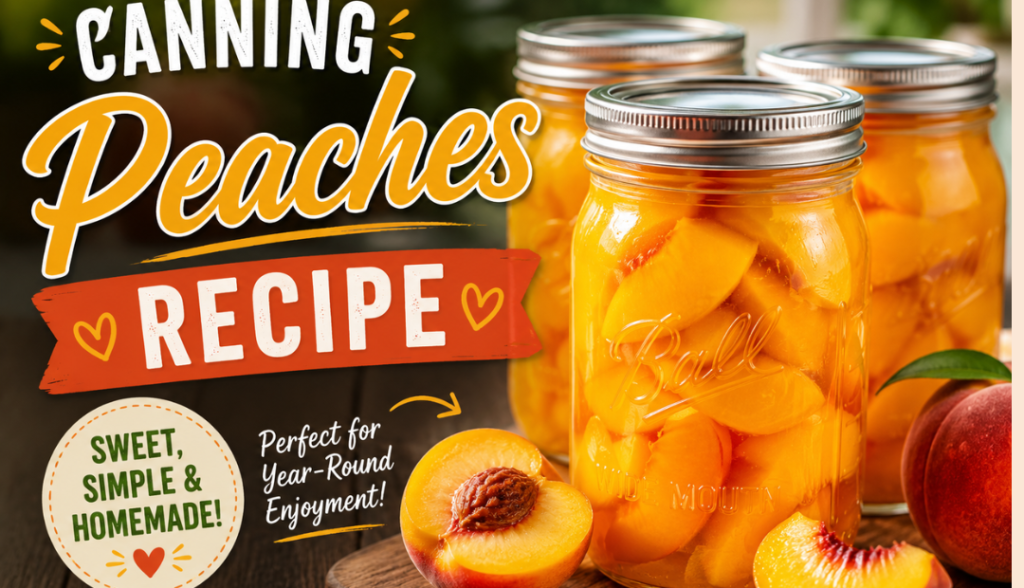
There’s a particular kind of magic that happens when you pop open a jar of home-canned peaches in the middle of January. The sweet, sun-drenched aroma that wafts out, the tender slices glistening in their syrup—it’s like bottling the very essence of summer. I learned to can peaches alongside my grandmother on muggy August afternoons, her kitchen windows steamed up and radio crackling old country tunes while we peeled and packed and processed jar after jar. What felt like a chore back then has become one of my most treasured seasonal rituals, a way to hold onto the fleeting peak of peach season and enjoy it all year long.
If you’ve never canned before, peaches are the perfect place to start. They’re naturally high in acid, which means they can be safely preserved using a simple water bath canner—no pressure canner required. The process is straightforward, deeply satisfying, and results in jars of fruit so superior to anything store-bought that you’ll wonder why you didn’t start sooner. I’ll walk you through every step, from selecting the perfect peaches to hearing that glorious ping of a sealed jar. Grab your apron, and let’s put up some peaches.
Why You’ll Love Canning Peaches at Home
- Unbeatable flavor – Home-canned peaches taste like summer, not tin. You control the sweetness and can avoid corn syrup and artificial additives.
- Cost-effective – Stock up when peaches are at their cheapest and ripest, and enjoy them for months.
- Immensely satisfying – Few things feel as accomplished as a pantry shelf lined with golden jars you preserved yourself.
- Versatile – Use them in cobblers, over yogurt, in smoothies, on ice cream, or straight from the jar.
- Perfect beginner project – Water bath canning is low-tech, safe, and quick once you get the hang of it.
Essential Equipment for Canning Peaches
Before you begin, gather your tools. Canning goes smoothly when everything is in place.
- Water bath canner – A large, deep pot with a rack inside to keep jars off the bottom. If you don’t have one, a very tall stockpot with a folded kitchen towel on the bottom can work in a pinch.
- Canning jars – Quart or pint-sized glass jars with two-part lids (flat lids and bands). Mason jars are the standard. Inspect jars for chips or cracks.
- New lids – Always use brand-new flat lids; bands can be reused as long as they’re rust-free.
- Jar lifter – Essential for safely moving hot jars in and out of boiling water.
- Lid wand or magnetic lid lifter – For retrieving lids from hot water without touching them.
- Funnel – A wide-mouth canning funnel keeps jar rims clean.
- Bubble remover/headspace tool – Often attached to the funnel, this measures headspace and releases trapped air bubbles.
- Clean kitchen towels – For wiping rims and setting hot jars on.
- Large bowl of acidulated water – Water with lemon juice or Fruit-Fresh to prevent peach slices from browning.
- Pot for blanching – A pot of boiling water for loosening skins, plus a bowl of ice water.
- Small saucepan – For heating syrup (if using).
Ingredients
- Fresh peaches – About 17–20 pounds of peaches will fill 7 quart jars; roughly 2–3 pounds per quart jar. Choose clingstone or freestone varieties (freestone are easier to pit).
- Sugar (optional) – For making a light syrup. You can also use honey, fruit juice, or plain water.
- Lemon juice – Bottled lemon juice for acidifying, or ascorbic acid (Fruit-Fresh) to prevent browning.
Syrup Options (makes about 6–7 cups syrup)
Choose your sweetness level. Sugar isn’t required for safety; it’s just for flavor and texture.
- Very Light Syrup – 1 cup sugar to 6 cups water
- Light Syrup – 2¼ cups sugar to 5¼ cups water (my go-to)
- Medium Syrup – 3¼ cups sugar to 5 cups water
- Heavy Syrup – 4¼ cups sugar to 4¼ cups water
- Honey Syrup – 1 cup honey to 4 cups water
- White Grape Juice – No added sugar, use 100% juice as the liquid
How to Can Peaches – Step by Step
This method covers both raw pack and hot pack. I’ll note where they differ so you can choose the texture you prefer. Raw pack gives firmer fruit but more floating; hot pack yields softer peaches but less floating and better syrup penetration. I use hot pack for most of my jars.
1. Prepare your canning equipment
Wash your jars, lids, and bands in hot, soapy water. Rinse well. Place jars in the water bath canner or a separate large pot and fill with enough water to cover them by at least an inch. Bring to a simmer (180°F) and keep the jars hot until you’re ready to fill them. Do not boil the lids—just place the flat lids in a small bowl and pour very hot (not boiling) water over them to soften the sealing compound. Keep them warm. Modern lids don’t require boiling, and doing so can cause sealing failures.
2. Select and prep your peaches
Choose firm, ripe peaches with no bruises or blemishes. They should be fragrant and slightly soft at the stem end. If they’re rock-hard, they’ll lack flavor; overripe peaches will turn mushy. Sort them by size and ripeness if you want uniform jar packs.
3. Peel the peaches (the easy way)
Peaches need to be peeled because the fuzz can harbor bacteria and the texture isn’t pleasant in the jar. The blanching method is a game-changer:
- Bring a large pot of water to a rolling boil. Prepare a big bowl of ice water.
- Gently lower a few peaches at a time into the boiling water using a slotted spoon. Let them boil for 30–60 seconds. When you see the skins starting to split, they’re ready.
- Immediately transfer the peaches to the ice water bath to stop the cooking. After a minute or so, the skins will slip off effortlessly. Discard the peels.
- If some stubborn bits cling, use a paring knife to gently coax them off.
4. Halve and pit, then prevent browning
Slice the peeled peaches in half along the seam and twist to separate. Remove the pit. If you like, scrape out the red fibrous area around the pit cavity (it can darken over time). Slice halves into wedges or leave them as halves—whatever you prefer. As you work, drop the peach pieces into a large bowl of water mixed with either ¼ cup bottled lemon juice per quart of water or a dose of ascorbic acid according to the package. This prevents browning.
5. Prepare the syrup
In a medium saucepan, combine your chosen sugar and water. Heat, stirring, until the sugar dissolves completely. Keep the syrup hot but not boiling. If using juice, simply heat it until hot. You’ll need about 1 to 1½ cups of syrup per quart jar.
6. Pack the jars
For hot pack (recommended):
Drain the peach slices and add them to the hot syrup in the saucepan. Bring to a boil, then reduce the heat and cook for 2–3 minutes. This heats the fruit through, releasing air and helping it settle in the jar. Using a slotted spoon, gently pack the hot peaches into hot jars. Ladle the hot syrup over them, maintaining the correct headspace.
For raw pack:
Drain the peaches and pack them tightly into hot jars without pre-cooking, as close as possible without crushing. Pour hot syrup over the raw fruit.
For both methods, leave ½ inch of headspace (the space between the top of the liquid and the jar rim) for both pints and quarts. Use your bubble remover tool or a non-metallic spatula to slide between the peaches and the jar, releasing trapped air bubbles. Add more syrup if needed to restore that ½-inch headspace.
7. Acidify each jar
This is a critical safety step to ensure the peaches are acidic enough to prevent botulism. Add bottled lemon juice directly to each jar before capping:
- Pint jars: Add 1 tablespoon bottled lemon juice
- Quart jars: Add 2 tablespoons bottled lemon juice
Do not use fresh lemon juice; its acidity is inconsistent. Bottled lemon juice is standardized to 5% acidity.
8. Wipe rims and seal
Wipe each jar rim meticulously with a clean, damp cloth or paper towel. Any residue—syrup, peach fuzz, oil—can prevent a seal. Place a warm lid on each jar, sealing compound side down. Screw the band on until it’s “fingertip tight”—snug but not forced, just until you feel resistance. Over-tightening can prevent air from escaping and cause buckling.
9. Process in a water bath canner
Place the filled, sealed jars upright onto the rack in your simmering water bath canner, ensuring they’re not touching each other. Add more boiling water if needed to cover the jars by at least 1 inch. Place the lid on the canner and bring the water to a full rolling boil. Start your timer only once the water has reached a vigorous boil. Process according to your altitude:
| Altitude (feet) | Processing Time (pints) | Processing Time (quarts) |
|---|---|---|
| 0 – 1,000 | 20 minutes | 25 minutes |
| 1,001 – 3,000 | 25 minutes | 30 minutes |
| 3,001 – 6,000 | 30 minutes | 35 minutes |
| Above 6,000 | 35 minutes | 40 minutes |
Keep the water at a steady boil throughout. If the water level drops, add more boiling water carefully so you don’t pour it directly onto the jars.
10. Cool, check seals, and store
When processing time is up, turn off the heat and carefully remove the canner lid away from your face to avoid steam. Let the jars sit in the water for 5 minutes. Then use the jar lifter to transfer them to a towel-lined surface, keeping them upright. Do not tilt them or wipe them down. You’ll start hearing the magical ping of lids sealing within a few minutes—music to a canner’s ears.
Leave the jars undisturbed for 12–24 hours. After cooling, check the seals: press the center of each lid. If it’s firm and doesn’t flex, it’s sealed. A sealed lid will be slightly concave. Any jars that didn’t seal should be refrigerated and used within a week, or you can reprocess them within 24 hours with a new lid. Remove the bands, wipe the jars clean, label them with the date, and store in a cool, dark place. Home-canned peaches will keep beautifully for at least a year.
Pro Tips for Perfect Canned Peaches
- Freestone vs. clingstone. Freestone peaches release the pit easily and are ideal for canning halves or slices. Clingstone peaches taste amazing but are harder to pit; use them for jams or preserves.
- Don’t skip the acid. Bottled lemon juice is non-negotiable for safety. It ensures the pH stays low enough to inhibit botulism spores. Even if your syrup tastes tart, it mellows in the jar.
- Prevent floating fruit. Hot packing is the best defense against peaches that float to the top of the jar. Pack fruit snugly but not so tight that it turns to mush. Releasing air bubbles thoroughly also helps.
- Keep jars hot. A jar that cools too much before processing can crack when placed in boiling water. Keep them in the canner or in a low oven (200°F) until fill time.
- Altitude matters. Always adjust processing time for your elevation. Under-processing can be dangerous, so check your altitude and consult a reliable chart.
- Use wide-mouth jars if possible. They make packing large peach halves much easier and look beautiful on the pantry shelf.
- Label everything. A year from now, you won’t remember which jar has light syrup and which has honey syrup. A simple sticker with the date and syrup type saves guesswork.
Variations & Flavor Add-Ins
- Vanilla-scented peaches: Add a split vanilla bean or a teaspoon of vanilla extract to the hot syrup before packing. It gives the peaches a delicate, bakery-quality aroma.
- Spiced peaches: Tuck a cinnamon stick, a few whole cloves, or a star anise into each jar before processing. Perfect for winter cobblers and holiday desserts.
- Bourbon peaches: Replace ¼ cup of water in the syrup with bourbon for a grown-up pantry treat. (The alcohol mostly cooks out during processing, leaving just the flavor.)
- Ginger-peach: Add a few thin slices of fresh ginger to the jar; they’ll infuse a gentle heat that pairs beautifully with the peach sweetness.
- Peach halves in honey syrup: Replace sugar entirely with mild honey for a more nuanced, floral sweetness.
- Mixed fruit jars: Layer peach slices with raspberries, blueberries, or peeled pear slices for a gorgeous fruit medley.
Frequently Asked Questions
Do I really have to peel the peaches?
Yes. The fuzz can trap dirt and microorganisms that water bath canning can’t reliably eliminate. Plus, the texture of peach skin after canning is unpleasantly tough and chewy. Peeling is quick and easy with the blanch method.
Can I can peaches without sugar?
Absolutely. Sugar is for flavor and texture, not safety. You can pack peaches in water, fruit juice, or a sugar-free syrup alternative. The fruit may be slightly softer and less sweet, but it’s perfectly safe as long as you still add the bottled lemon juice.
Why did my peaches turn brown?
Enzymatic browning happens when cut fruit is exposed to oxygen. Soaking in acidulated water (lemon juice or ascorbic acid) while you work helps tremendously. Also, ensure the syrup and jars are hot during packing, and process immediately. Some darkening over months is natural but doesn’t affect safety.
What if my jars don’t seal?
If a jar hasn’t sealed after 24 hours (the lid pops when pressed), you can either: 1) store it in the refrigerator and eat within a week; 2) reprocess it within 24 hours using a new lid and the full processing time; or 3) transfer to a freezer-safe container and freeze. Never store unsealed jars at room temperature.
Can I use a pressure canner for peaches?
You can, but it’s unnecessary and can turn your peaches mushy. Water bath canning is the recommended method for high-acid foods like peaches. If you do use a pressure canner, follow the manufacturer’s instructions for timing and pressure, but expect a softer texture.
How long will home-canned peaches last?
Properly sealed jars stored in a cool, dark, dry place will maintain best quality for 12–18 months. They’re safe to eat beyond that as long as the seal remains intact, but texture and color may degrade. Always discard any jar with a bulging lid, signs of mold, or off-odors.